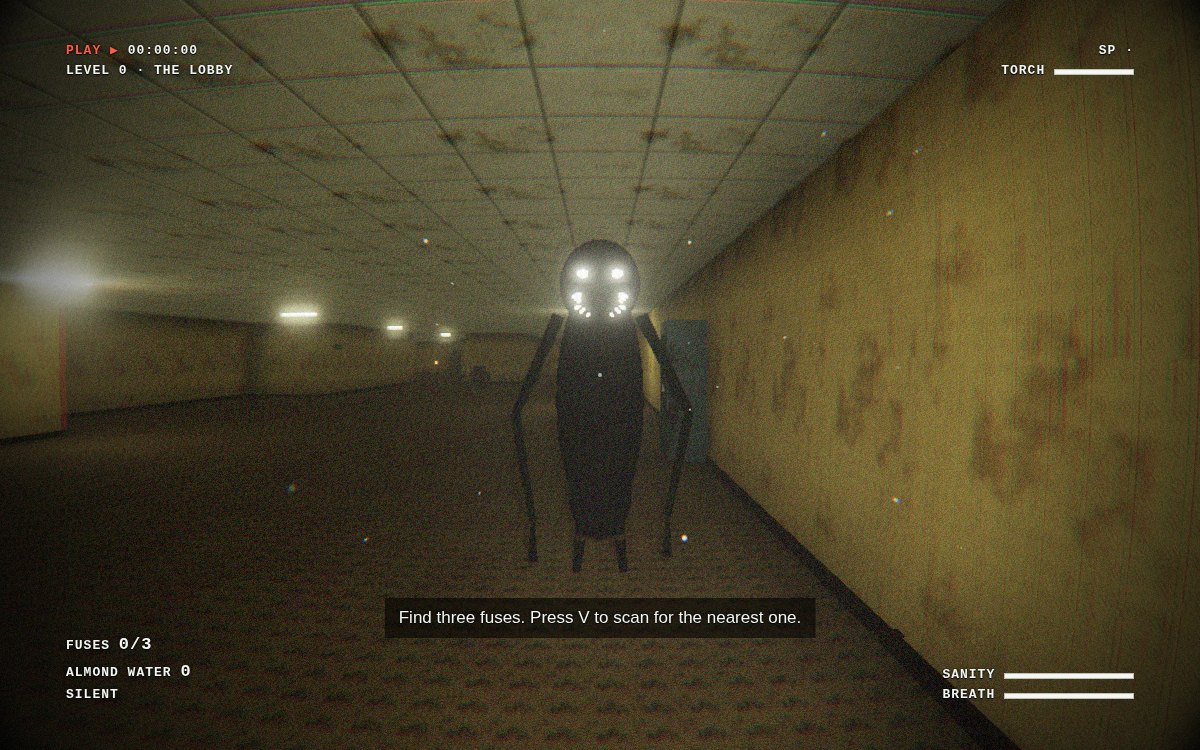
The four levels
- Level 0 · The Lobby: yellow wallpaper and wet carpet. Find three fuses and fit them in the box by the exit door.
- Level 1 · Habitable Zone: a concrete warehouse. Find the red and the blue keycard and call the lift. The power cuts out about once a minute.
- Level 2 · Pipe Dreams: hot, narrow tunnels and a proper maze. Throw four breakers on the walls to open the hatch.
- Level ! · Run For Your Life: one red corridor. No items. You sprint and it chases.
Three stars on a level: get out, keep your sanity above half the whole time, and beat the par time. Each level saves your best time.
Controls
- WASD: walk. Mouse: look (click the game to lock the mouse).
- Shift: run. Uses your breath.
- C: crouch on or off. Slow and silent.
- F: torch. It runs on batteries.
- E: pick up, use the exit, hide in a locker.
- Q: drink almond water. V: scan.
- P / Esc: pause. Graphics can be changed there.
- Touch: left thumb moves, drag on the right to look, and use the buttons.
What is down there
- The Smiler (Levels 0 and 1): it only moves when you are not looking at it with a light. Keep your torch on it and back away. Stare at it for three seconds and it leaves for a while. On Level 0 it wakes up when you take the first fuse.
- The Deathmoth (Levels 0 and 2): it comes to your torch. When you hear wings, turn the torch off and wait.
- The Hound (Level 1): it hunts by sight and it is faster than you. Get round a corner, then get in a locker. If it watched you get in, the locker will not save you.
- Crawlers (Level 2): blind. They come to footsteps, breakers and the scanner. Crouching is silent.
- The Fastest Entity (Level !): it starts three seconds behind you and it gets faster.
Sanity, torch and scanner
- Sanity drops slowly all the time. It drops faster in the dark, near a creature and inside a locker. At zero the tape ends.
- Almond water gives back a big piece of sanity. Walk over a bottle to take it, press Q to drink.
- The torch lasts under three minutes. Yellow batteries on the floor top it up. Turn it off under working lamps.
- The scanner (V) shows an arrow and a distance to the next thing you need, then the exit. It takes nine seconds to recharge and Crawlers can hear it.
- Green EXIT arrows painted on the walls always point along the true way out.
Useful strategy
- On Level 0, find where the exit is before you take the first fuse. After that the Smiler is awake.
- Walking backwards with the torch on the Smiler is slow but safe. Turning and running is fast but it follows.
- On Level 1, note where the lockers are as you pass them. You will not have time to look later.
- When the lamps start to flicker on Level 1, a blackout is two seconds away. Face the way you came.
- On Level 2, walk. Running carries three times as far. Crouch when the clicking gets fast.
- On Level !, hold Shift, take the corners wide and go round the junk. A wrong turn at a fork is a dead end.
How it is made
Backrooms 2 runs on the renderer written for Dead Air, with no game engine and no downloaded pictures.
- Each maze is built from a number when you press play. The same number always makes the same maze, and it is shown on the level card.
- The wallpaper, carpet, ceiling tiles, concrete and brick are all drawn by code when the game loads.
- Lamps are blocked by walls, so light stops at corners. Some flicker, some are dead.
- The picture goes through an old video camera: lens bend, tape noise, colour bleed and a timecode.
- Every sound is made by code as well, including the hum.